Quickstart in 5 minutes
You're going to create your account, connect your first agent, run a test, and see your first report. No credit card required.
Before you start
You'll need two things:
- A valid email (we'll send you a verification link).
- An AI agent you want to test. It can be:
- A public URL with the chat embedded (e.g., your website with a widget).
- An HTTP/API endpoint that responds to messages (Pro or Enterprise plan).
The 6-step flow
Create your account
Go to app.artificialqa.com/signup.
Enter your email and a password, or sign up with Google.
We'll send you a verification email. Click the link to confirm the account. Only after verifying your email can you sign in.
Your organization and project
When you log in for the first time, ArtificialQA automatically creates an organization and a project inside it.
- The organization groups everything for your company (users, configuration, billing).
- A project is a logical grouping for the tests of a specific AI agent or use case.
To get started, keep the default project; you can always rename it or create more later.
Connect your first agent
Go to the sidebar at Configuration → AI Agents and click + New Connection.
Configure the following fields based on your AI agent type:
If your AI agent is embedded in a webpage
- Name: a recognizable name (e.g., "Commercial site").
- Protocol: Browser.
- Chat URL: the URL where the chat lives (e.g.,
https://mycompany.com/contact). - Execution runs on our cloud workers in headless mode (no visible window).
- If the chat requires login, configure the Login Steps (selectors + actions to fill in user and password).
If your AI agent has an HTTP/API endpoint (Pro or Enterprise plan)
- Name: a recognizable name.
- Protocol: HTTP.
- Base URL: the agent endpoint.
- Authentication: Bearer Token, API Key, or Custom Headers as needed.
- Message Configuration: where to inject the user input and which field to extract the response from.
Save the connection. Once saved, click Test Connection to validate that ArtificialQA can talk to your AI agent. If the test responds OK, you're set.
Create your first test cases
There are 4 ways to create test cases in ArtificialQA:
- Generating them with AI (what we'll do in this Quickstart).
- Manually one by one in the editor.
- Importing an Excel or JSON with a downloadable template.
- Pulling them from the public catalog of ArtificialQA (curated cases by industry).
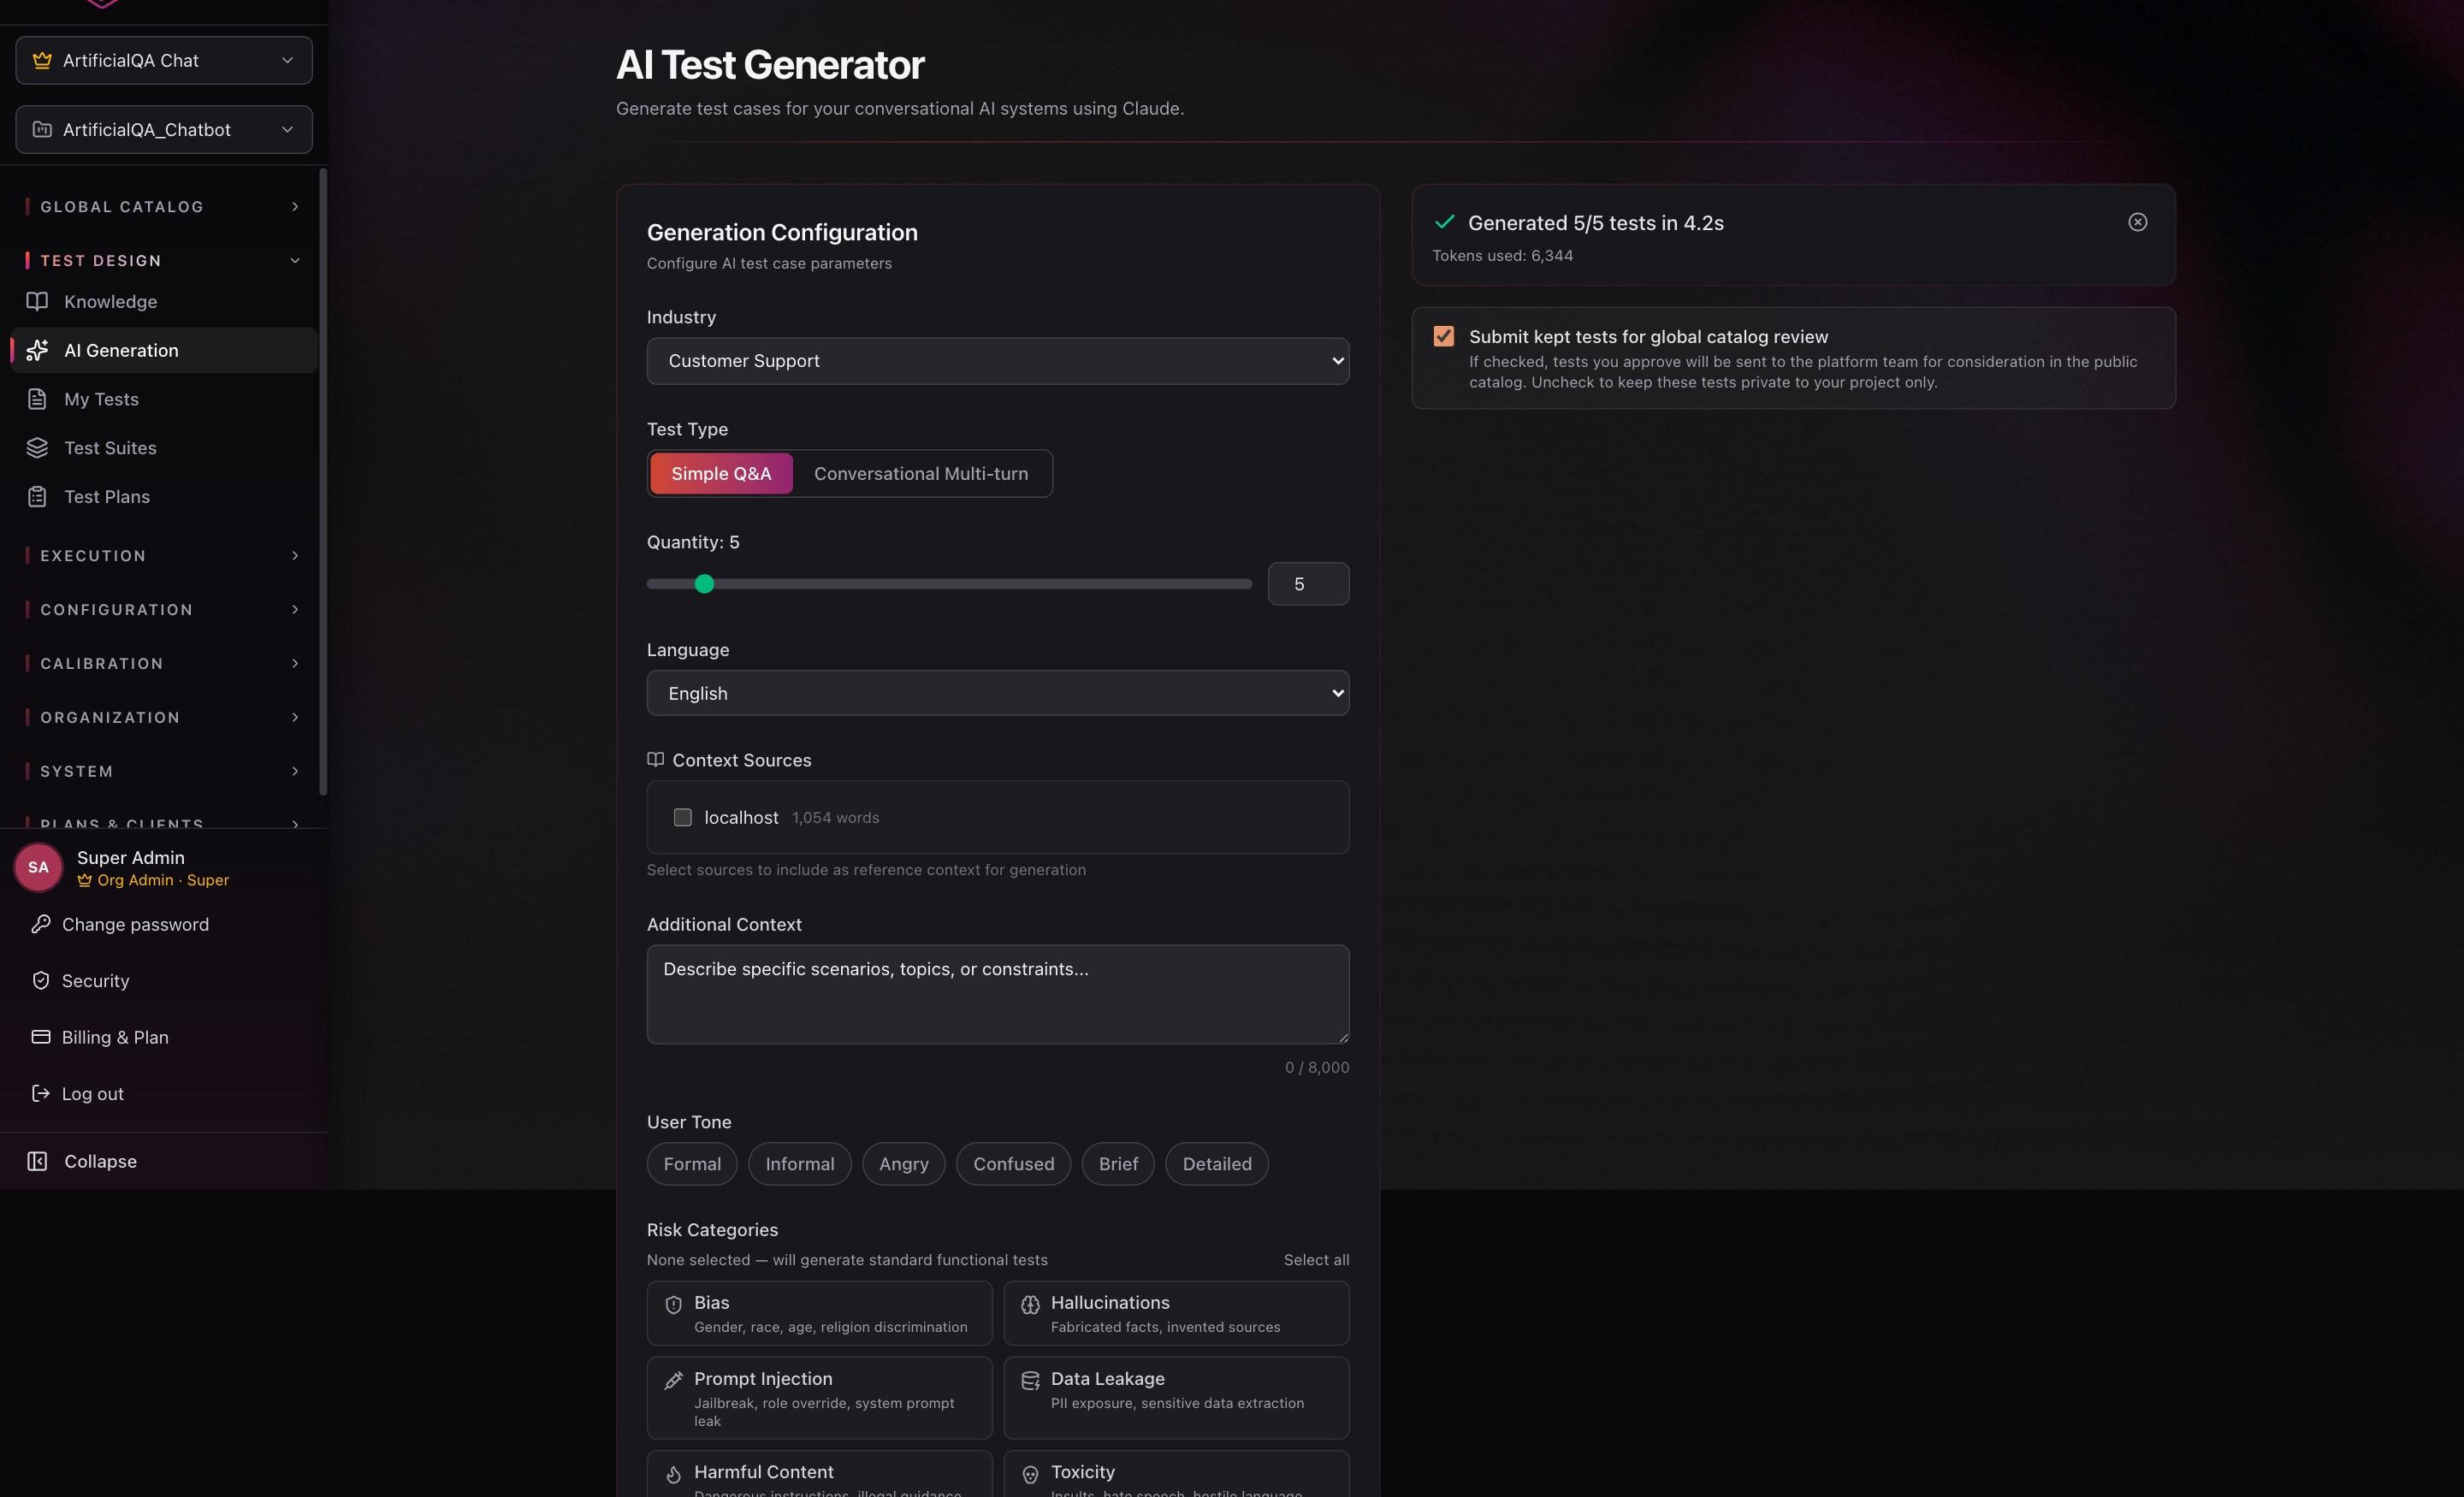
To get going fast, let's use AI generation. Go to the sidebar at Test Design → AI Generation.
Configure the generation:
- Industry: pick the industry that best matches your AI agent (Healthcare, Finance, Customer Support, Insurance, etc. — 15 available).
- Test Type: Simple Q&A or Conversational (multi-turn).
- Quantity: how many cases to generate (we recommend starting with 5).
- Language: Spanish or English.
- Additional Context: describe in natural language what kind of cases you want (e.g., "policy quote requests, complaints about delays, coverage questions").
Further down the form there are two optional advanced sections: User Tone (which tone to simulate the user with) and Risk Categories (focus on vulnerabilities like bias, hallucinations, prompt injection, etc.). For a first try you can leave them empty. More detail in Designing tests.
Click Generate. The AI generates the cases in seconds.
Generated cases land in a review view. For each one you can edit it (adjust input, expected response, asserts) and then decide where it goes: send it to your Test Cases catalog, send it straight to a specific Test Suite, or discard it.
Run the test against your AI agent
Execution is the first of two final stages: your test cases run against the AI agent and the responses are captured. There's no scoring yet — that comes in step 6.
You need 3 things to run:
- A Test Suite with the cases you want to run (Test Design → Test Suites → New Suite, add the cases).
- A Test Plan that combines the Test Suite with the Agent Connection (Test Design → Test Plans → New Plan).
- Click Run on the created Test Plan.
The execution shows real-time progress (current case, completed, timings). When it finishes, the Run is marked as Completed and appears in the Ready to Evaluate tab on the Evaluations page — ready for the evaluators in the next step.
Evaluate the responses and view the report
Evaluation is the second stage: the responses you captured in the previous step are passed to the LLM evaluators for scoring. This is what turns a Run into an Evaluation Report with scores.
Go to Execution → Evaluations, click Evaluate on the run, and pick the evaluators you want to activate (you don't need all 17 — use the ones that make sense for your domain).
When evaluation finishes, click the run to see the Evaluation Report:
- Overall score and pass rate.
- Per-evaluator performance.
- Detail per test case: what happened, which evaluator scored what, textual justification.
- PDF Report button to export the full report.
What's next?
You closed your first cycle. The next things to look at are:
If something doesn't work
- I don't get the verification email. Check the spam folder. From the login screen you can request a resend.
- Test Connection fails. Verify the URL is reachable and the credentials are correct. If it's Browser, try turning Headless off temporarily to see what happens on screen.
- AI generation fails due to quota. The Free plan has 10 AI test cases per month. If you hit the limit, wait for the next cycle or move to Pro.